Have an issue with Facebook, Twitter or other social network integration into EasySocial? Look here for the most common support questions.
How to integrate Social Logins into EasySocial
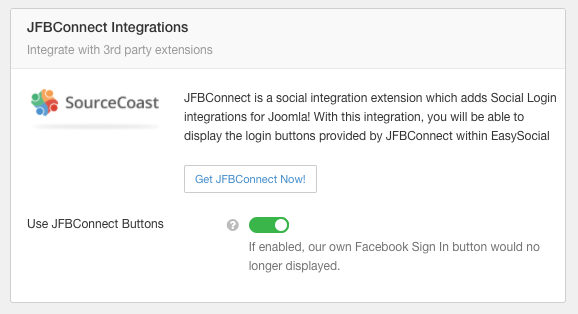
EasySocial includes a simple process to integrate with JFBConnect. To enable, navigate to the EasySocial > Settings > Social > Facebook tab.
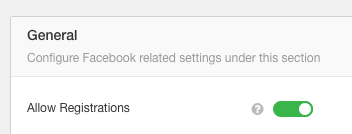
- Enable the "Allow Registrations" option.
- Enable the "Use JFBConnect Buttons" setting, as seen in the image below:
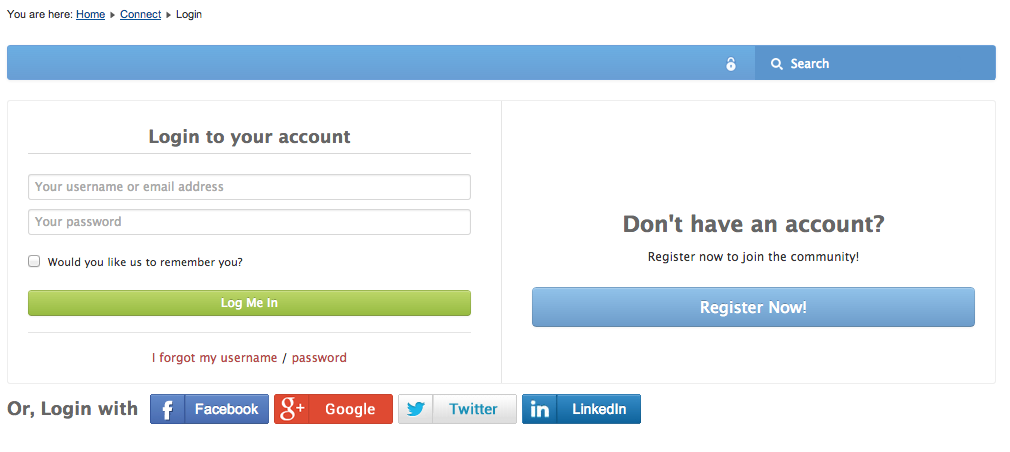
Once both settings enabled, the social login buttons from JFBConnect will automatically be added to the EasySocial pages. Please note that even though these settings in EasySocial are in the Facebook tab, login buttons will be displayed for any social networks that have been configured in JFBConnect.
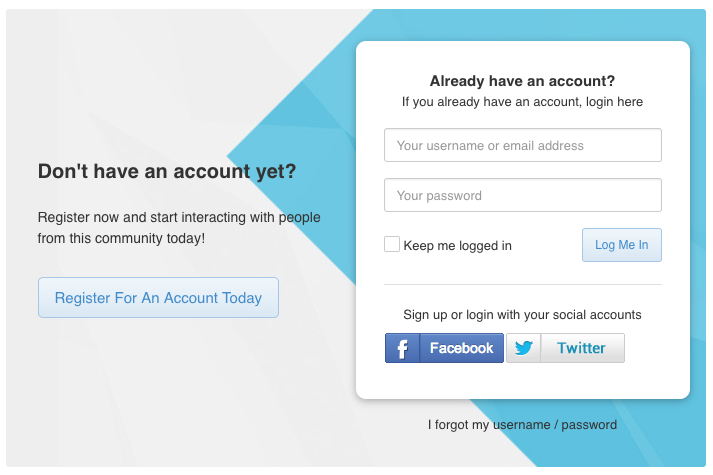
The result of this modification will look like:
How to Configure JFBConnect for EasySocial
Once JFBConnect integration with EasySocial has been enabled, you need to setup JFBConnect's integration. There are a lot more options available for user registration and login when using JFBConnect, giving you maximum flexibility over registration flow on your website. If you haven't already, you should go through the full JFBConnect Configuration Guide and review settings for Registration & Login - a couple of the options from these pages are discussed below in the next 'Registration & Redirection Settings' section as they specifically pertain to EasySocial:
Registration & Redirection Settings
- If desired, you can set the 'Registration Component' setting in the JFBConnect > Configuration > General area to go through the EasySocial registration flow instead of JFBConnect's mini-registration page. When one of the social login buttons is clicked, the flow set in the 'Registration Component' will be used. This setting is only applicable when 'Automatic Registration' is disabled.
- To use JFBConnect's redirection settings, you may need to update redirection settings in the 'System - EasySocial' plugin. Specifically, you may want to disable the "Enable com_users Redirection" setting in this plugin if you encounter strange redirection issues when using both EasySocial and JFBConnect on your site.
Profile Integration
After JFBConnect is configured, you can customize the EasySocial profile integration features. The following steps will guide you through the process:
- Enable the Social Profiles - EasySocial plugin in the Joomla Plugin Manager
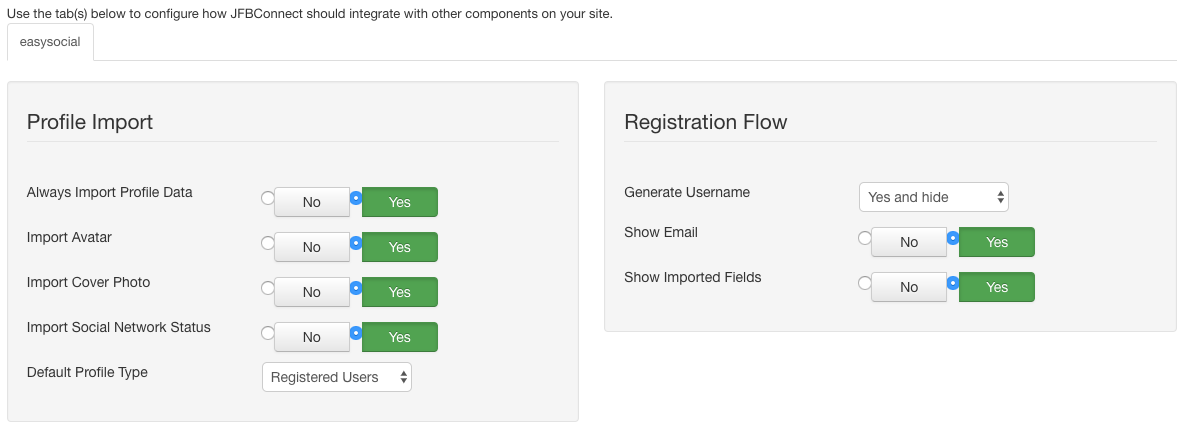
- Navigate to JFBConnect -> Profiles in the administrator area of your website
- You will see settings like below. Each setting has a tooltip explaining the functionality.
With older versions of EasySocial: Using JFBConnect, you can add the social login features into the main Login / Register page of EasySocial by adding the {JFBCLogin} easy-tag. This will automatically add the social login buttons for any social networks you have configured in JFBConnect to EasySocial.
<div class="row-fluid">
  <div class="span12" style="margin: 10px 0 0 0">
      {JFBCLogin text=Or, Login with}
  </div>
</div>
- Edit the file /components/com_easysocial/themes/wireframe/login/default.php file
- At the bottom of the file, add the following line with {JFBCLogin}
Additional Styling
The code above should make the buttons appear with the proper text. Some additional styling or updates can be made, such as:
- Update the "Or, Login with" text or margin as desired for your site.
- Add specific styling to the "Or, Login with" intro text to make the font larger and grey, similar to the other EasySocial text, like:
.sourcecoast .social-login .intro {
  font-weight: bold;
  font-size: 18px;
  color: #666;
}
The result of this modification will look like:
 Once both settings enabled, the social login buttons from JFBConnect will automatically be added to the EasySocial pages. Please note that even though these settings in EasySocial are in the Facebook tab, login buttons will be displayed for any social networks that have been configured in JFBConnect.