The Google Application setup process takes a few more steps compared to creating a Facebook Application. Due to limitations in the Google API, it's not possible for our Autotune tool to automatically configure the settings specifically for your site. The steps below should guide you through the entire process.
- Navigate to https://cloud.google.com/console (You will need to log in with a Google account, if you aren't already).
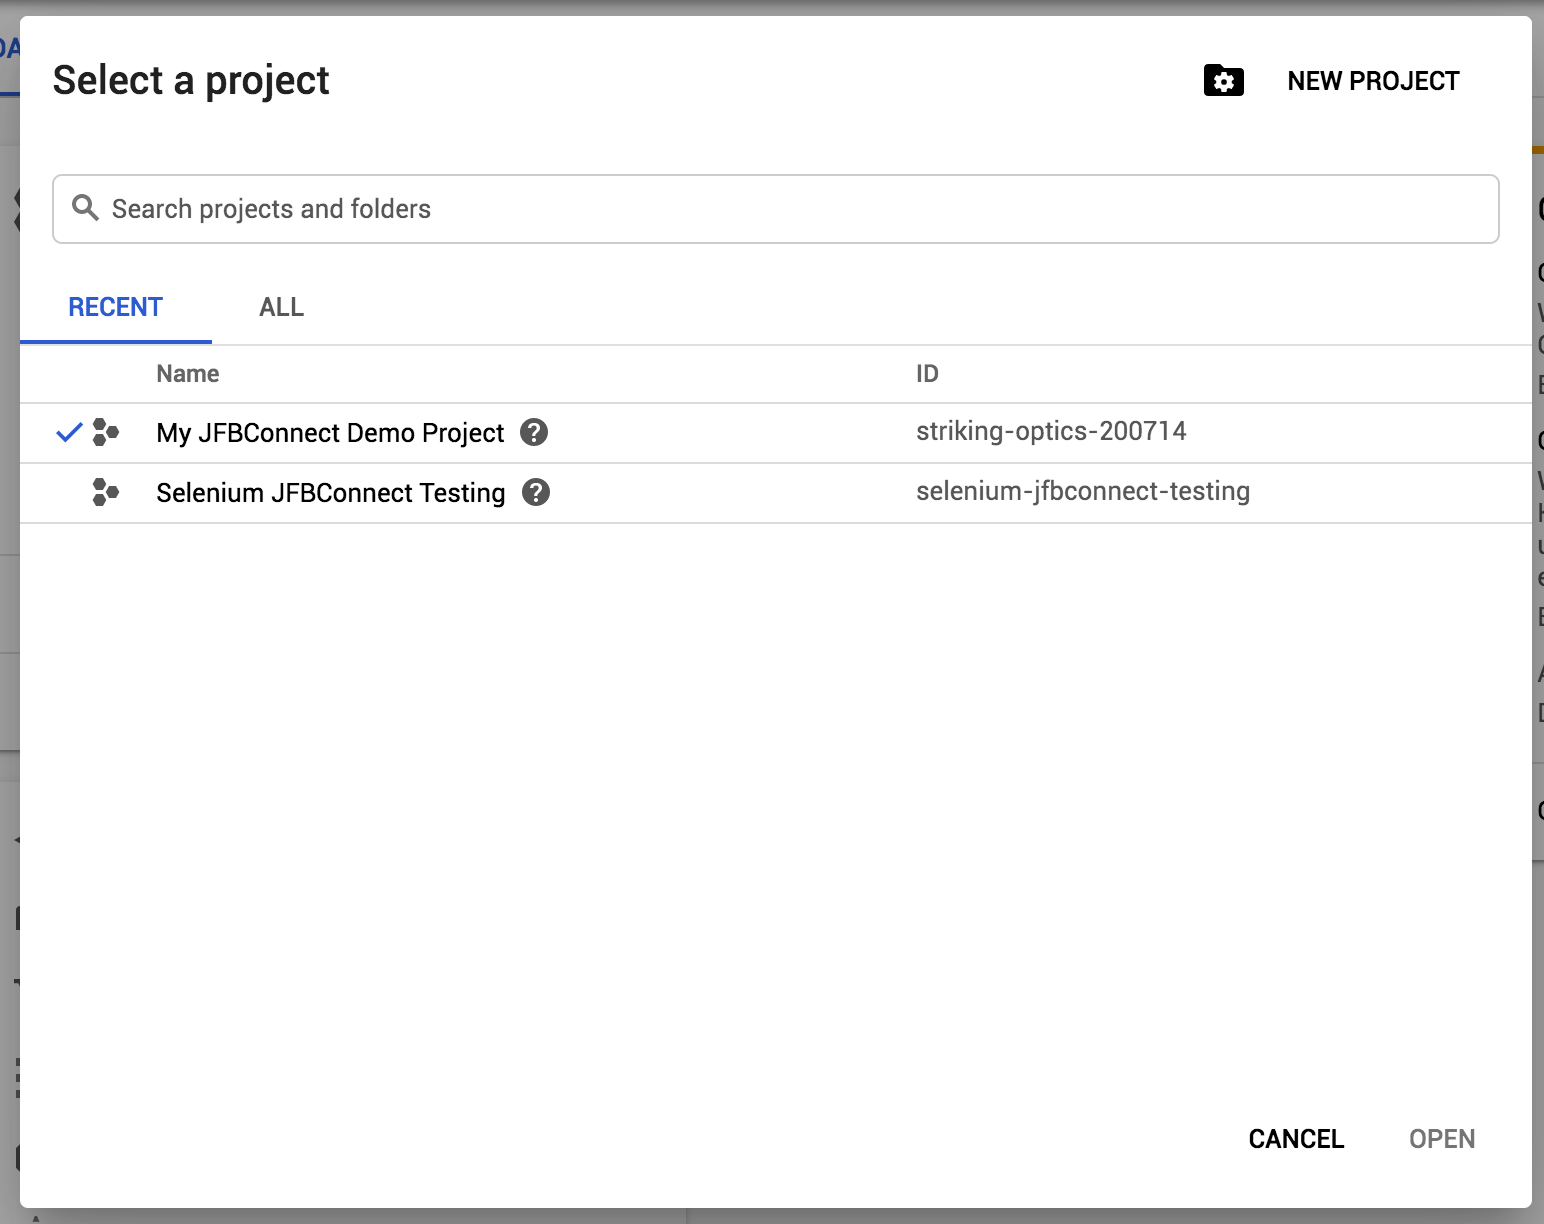
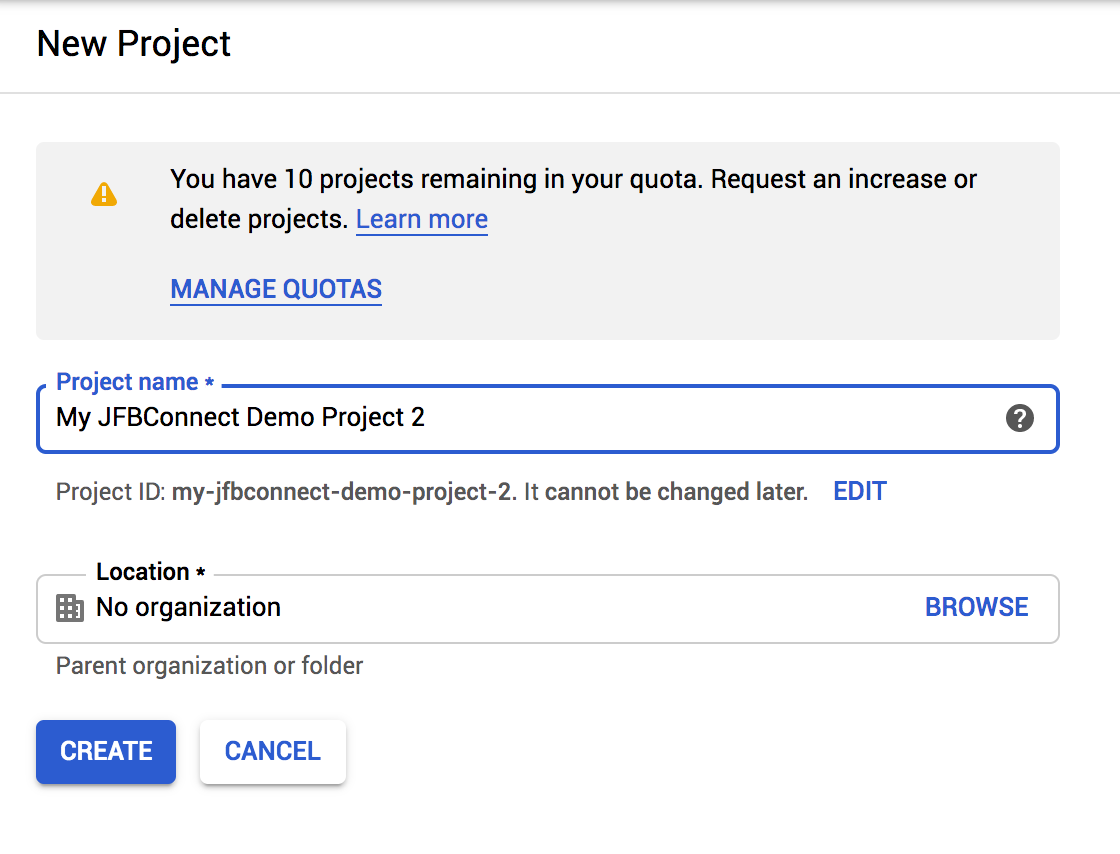
- Open the projects list in the top toolbar and select 'New Project' in the popup to create a new project.
- Update the settings in the "New Project" screen.
- Project Name: Enter a project name. This is usually the title of your website, "My Great Website".
- Project ID: You may edit your project ID if desired. A good choice is your domain name, like "sourcecoast-com". A name is automatically created, but you can edit this value.
- Location: Enter a Location or leave it set to the default "No organization".
- Hit Create.
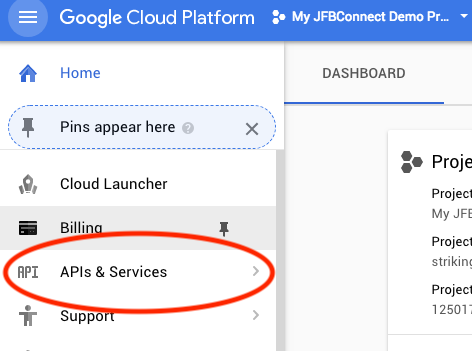
- After the project is created, go back to the dashboard and select your project in the project list.
- Now the correct APIs must be enabled. From either the Quick Access section or project menu, click on "APIs & Services".
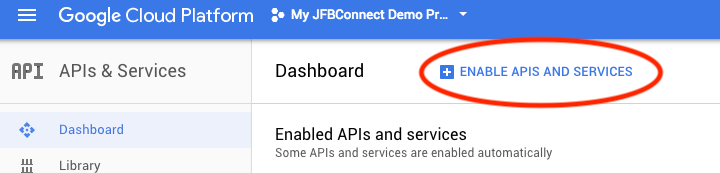
- This will take you to an area to customize your application. Click on the "+ Enable APIs and Services" option at the top of the page.
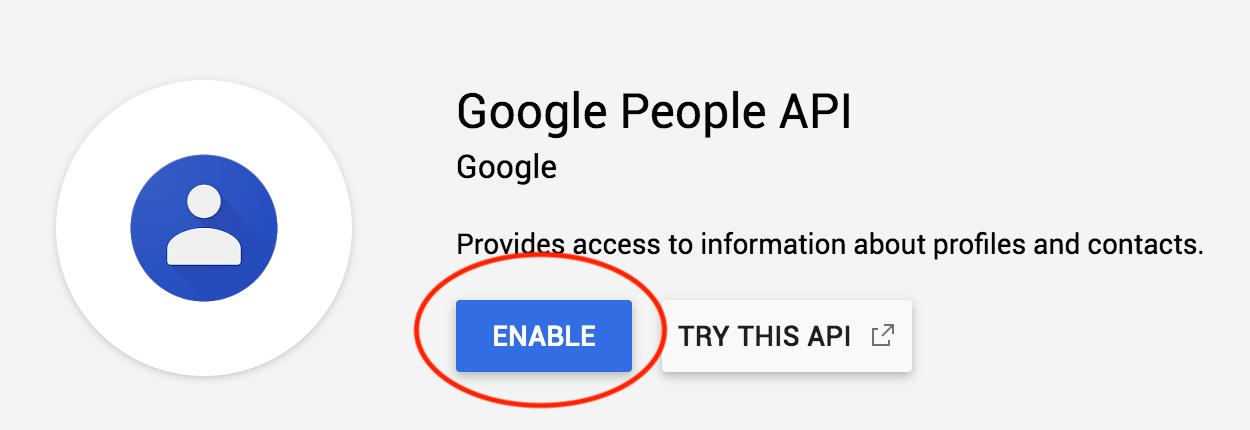
- Find the "Google People API" link in the Social Section. Click the box to set it up.
- Don't forget to click the "Enable" link to turn it 'On'.
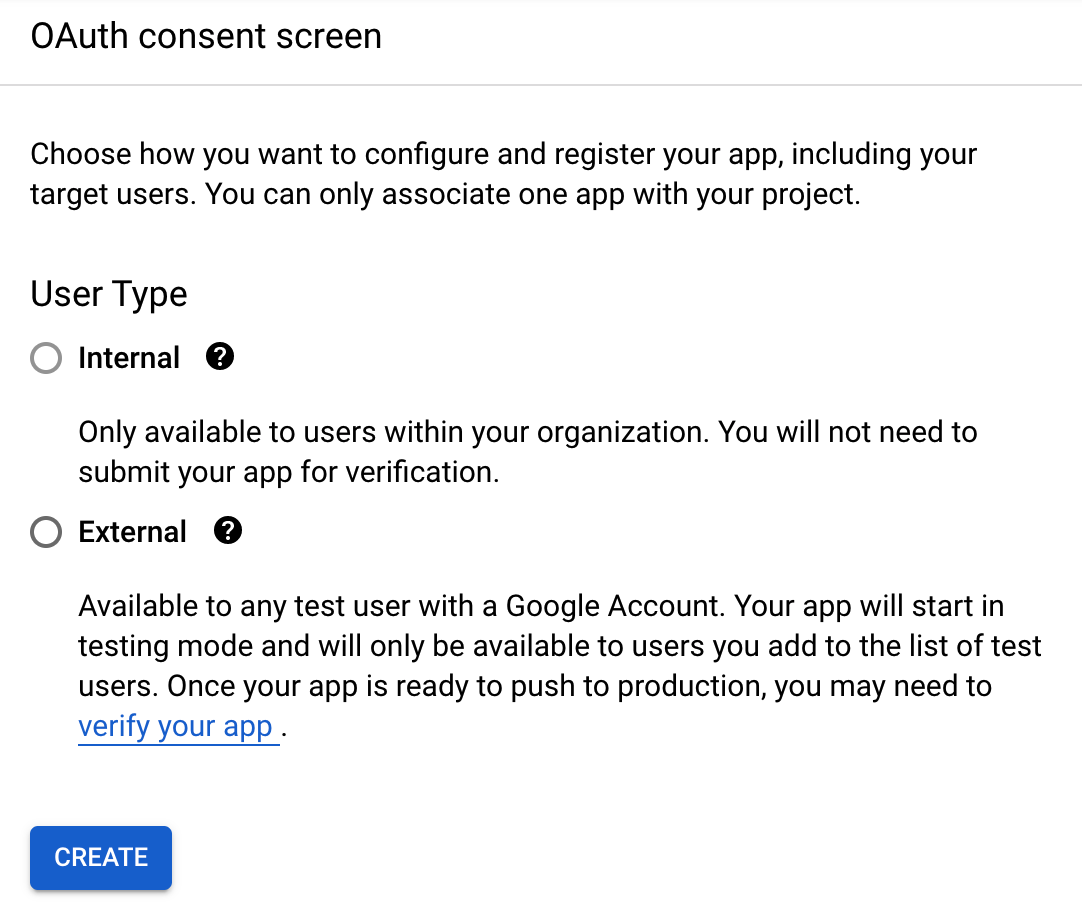
- OAuth consent screen
- In the left menu, click the "OAuth consent screen" sub-menu.
- Select whether only users in your organization or all users will be allowed to authenticate. There may be extra steps to verify your app for External users (not discussed here - follow the link in Google).
- Click Create.
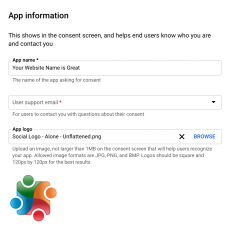
- App information
- Enter an App Name. This will be the name displayed when the front-end user must consent to authentication.
- Enter a User Support Email.
- Add an App Logo.
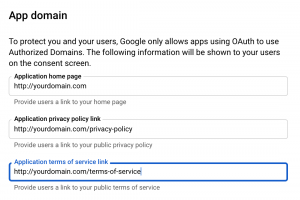
- App Domain
- Enter a value for your Home Page link. This is shown on the consent screen
- Enter a value for your Privacy Policy link. This is shown on the consent screen.
- Enter a value for your Terms of Service link. This is shown on the consent screen.
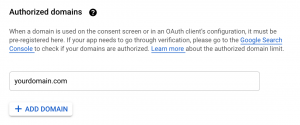
- Add a value to Authorized domains. It should match the domain from the Application home page link.
- Developer contact information - enter a valid email address for users to contact you for support
- Click the "Save and Continue" button.
- Scopes - After configuring the OAuth Consent Screen, you're brought to scopes.
- Click on the "Add or Remove Scopes" button to add scopes. If you'd like to import specific profile data from Google, find entries for the People API and select/update for those scopes. Note: This is optional
- Once you're done selecting scopes, click "Save and Continue"
- Save through the Test Users screen to get to the Summary. Review your items here.
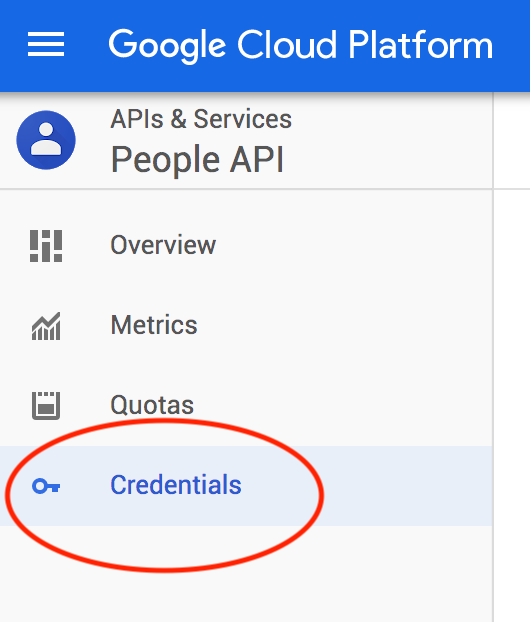
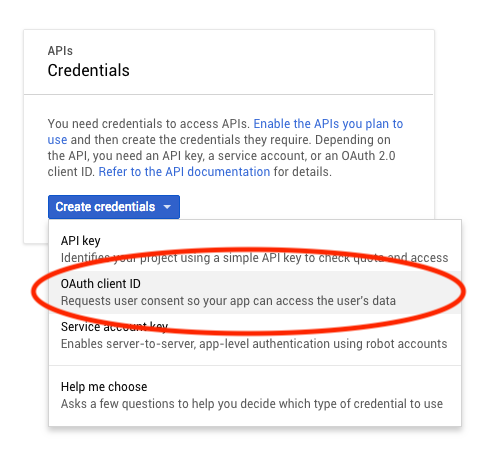
- Add Credentials
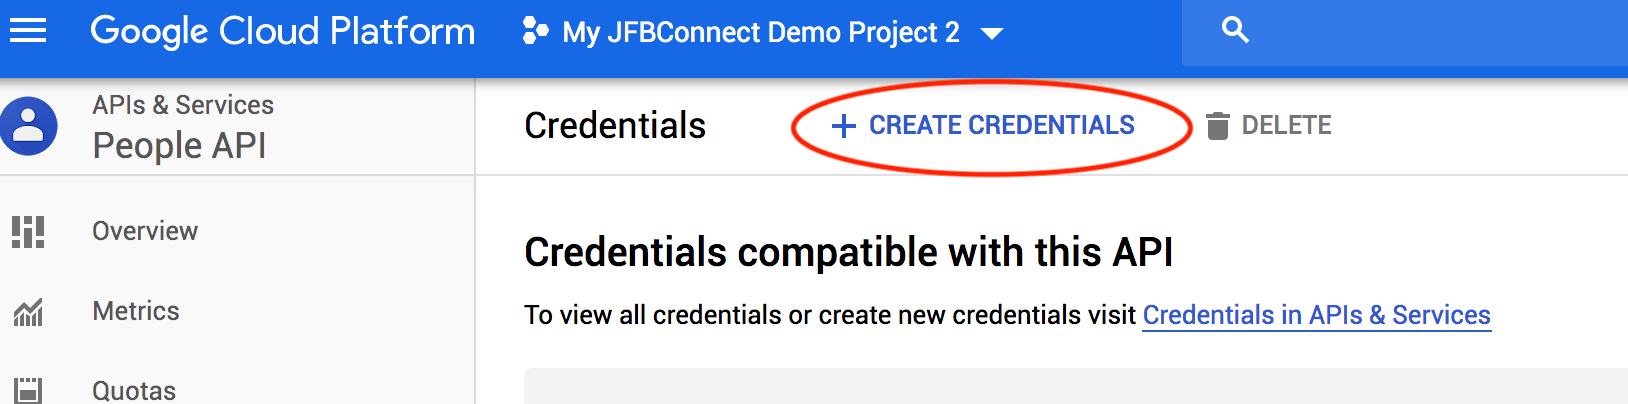
- In the left menu, click the "Credentials" sub-menu or click the "Create Credentials" button.
- Click the top "+ Create Credentials" link.
- Click the OAuth Client ID link.
- Select "Web Application" as the Application Type.
- Update the "Name" for the application if desired. A good choice is your domain name, like "sourcecoast-com". A name is automatically created, but you can edit this value.
- In the "Authorized Javascript Origins" box, enter your website domain. Secure HTTPS is required for Google Login. To fill out multiple values, press the Enter / Return key and a new entry will be created. If you have https enabled on your site, enter that address as well in a separate entry, like:
https://yourdomain.com
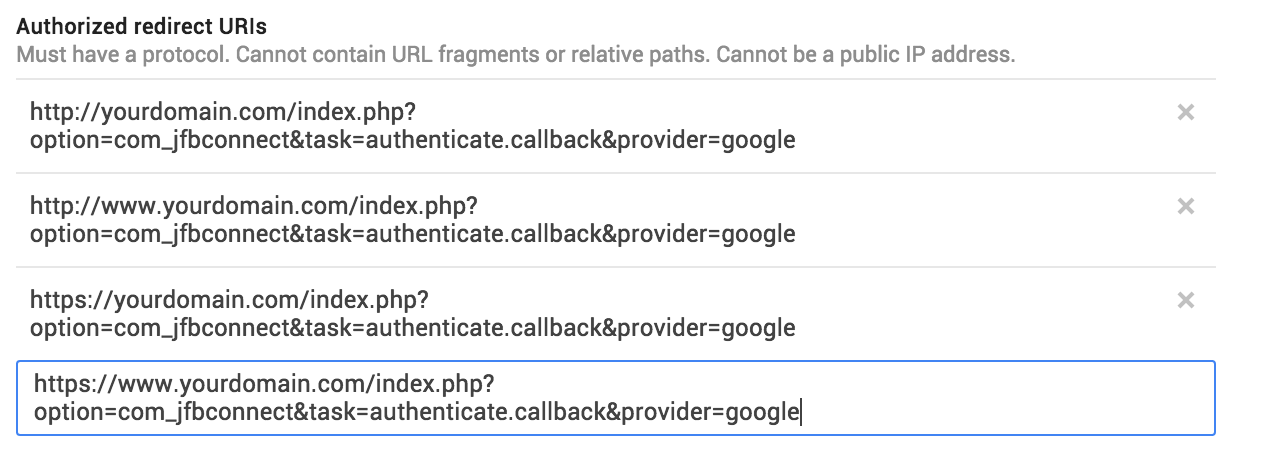
- In the "Authorized redirect URIs" section, add the following URL (replacing yourdomain.com with your actual domain name). Secure HTTPS is required for Google Login. Again, if you have other ways to access your domain (like www and non-www), add them all here in separate entries, like:
https://yourdomain.com/index.php?option=com_jfbconnect&task=authenticate.callback&provider=google
https://www.yourdomain.com/index.php?option=com_jfbconnect&task=authenticate.callback&provider=google
- Click the "Create" button.
- A new popup will appear with the "Client ID" and "Client Secret". Save these two values for "Client Id" and "Client Secret" settings for use in the JFBConnect configuration area. When you visit the API Manager > Credentials section, you can find the id and secret again.
- Once your Registered App has been created, go to the "OAuth consent screen" menu item to further configure how your app approval dialog. Specifically, you must set the Product Name and Authorized Domains (as described above in step 6), which is shown to users on the login/authentication prompt.

