The Twitter Application setup process is described below. These steps below should guide you through the entire process. Please note that this guide will explain how to create an app as part of an existing project. Standalone apps are limited to v1 of the Twitter API, whereas apps as part of a project may use v1 or v2.
- Navigate to https://developer.twitter.com/en/apps.
- In the top right, click the "Sign In" and login with your Twitter account.
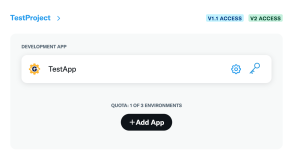
- Create a project (not detailed in this guide)
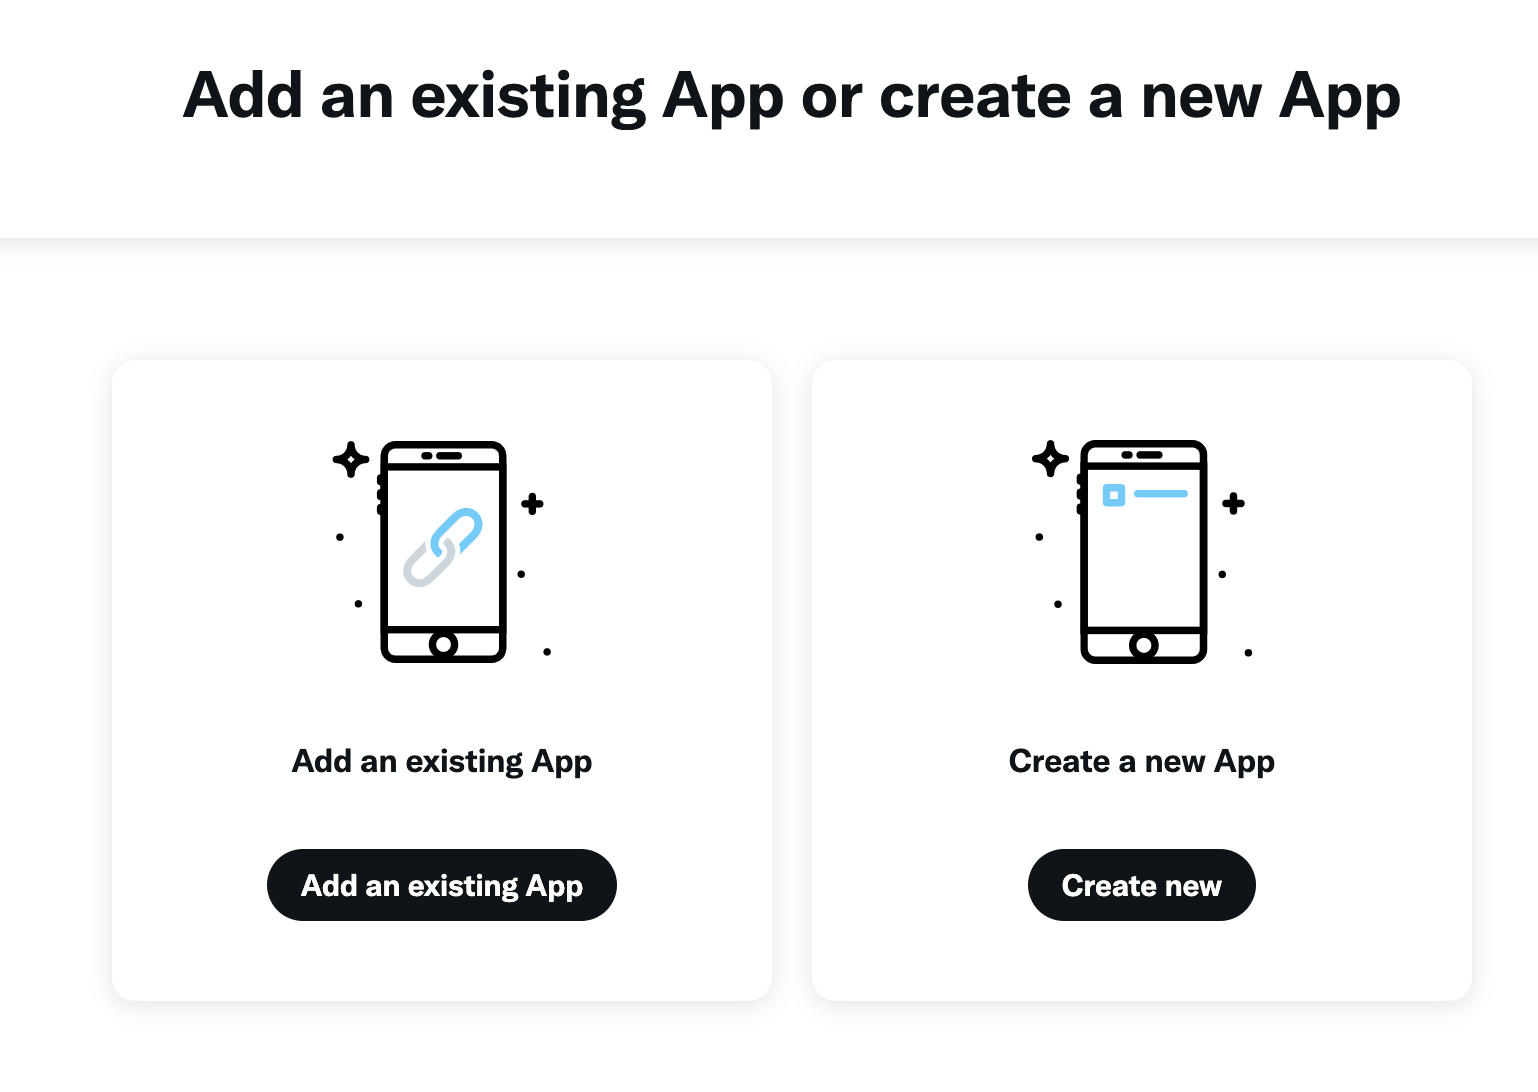
- Click the 'Add App' button in your project.
- Click the 'Create a New App' button.
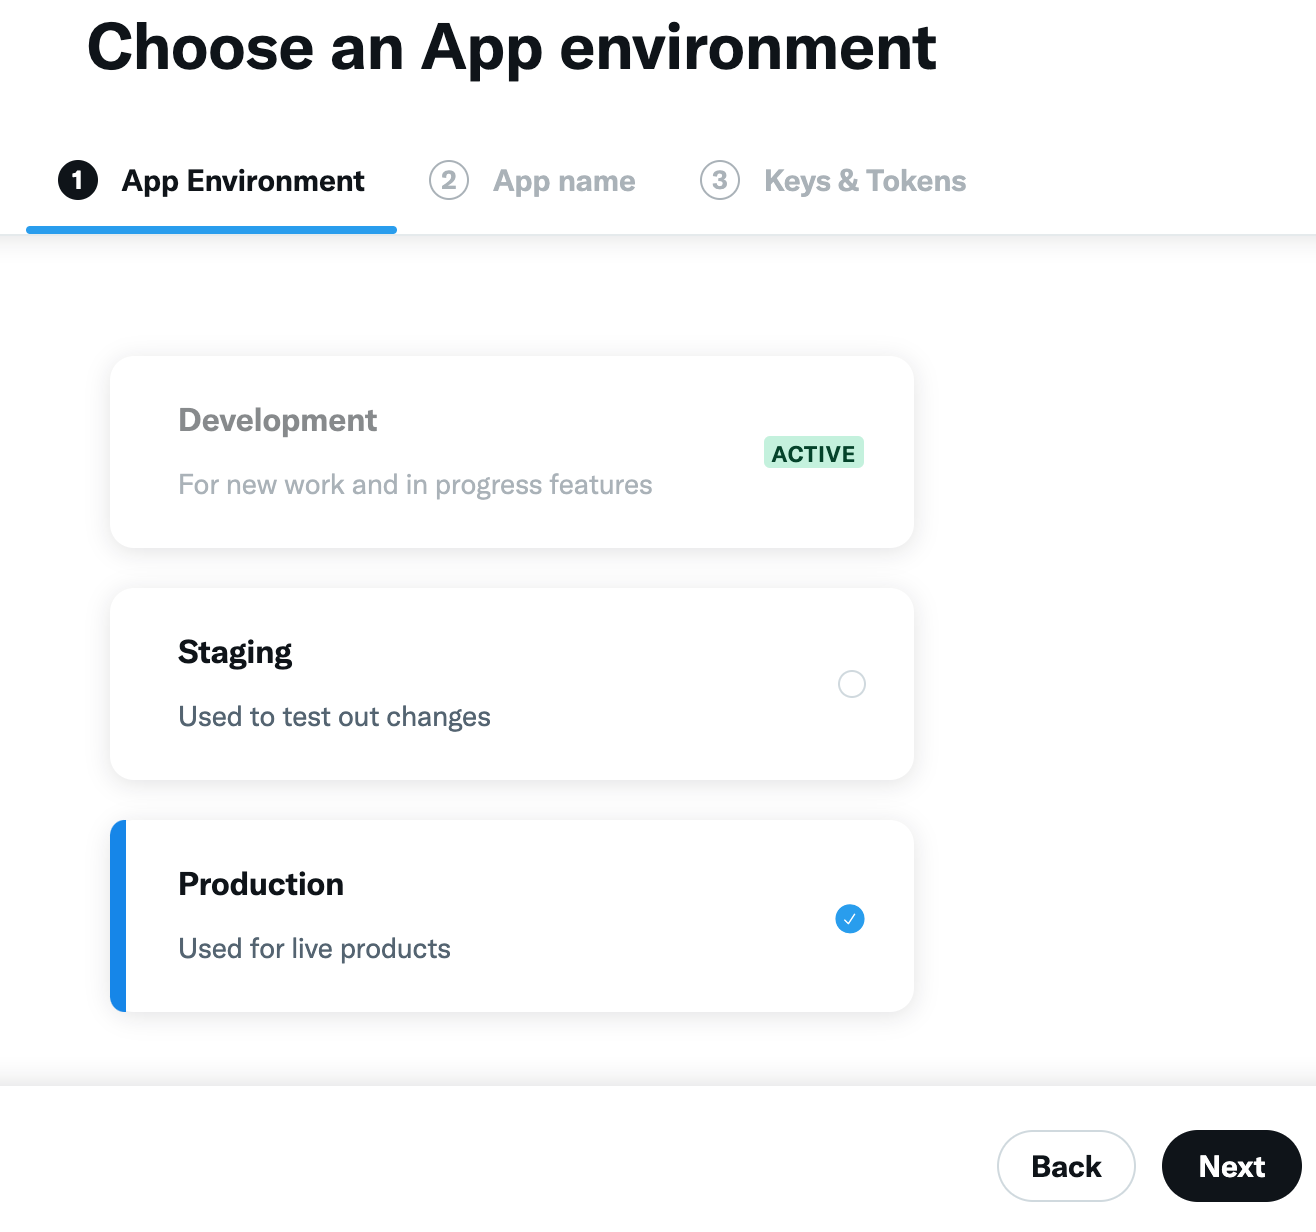
- Choose a Production app environment and hit Next.
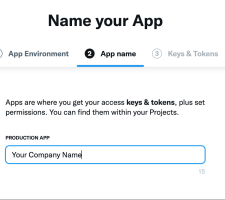
- Fill out the Name of your app and hit next
- After you hit Next, the next screen will show your OAuth 2.0 Client ID and Client Secret. Use the Client ID and Client Secret in the JFBConnect backend settings for Twitter Application ID and Twitter Secret Key.
- Click on the App Settings button.
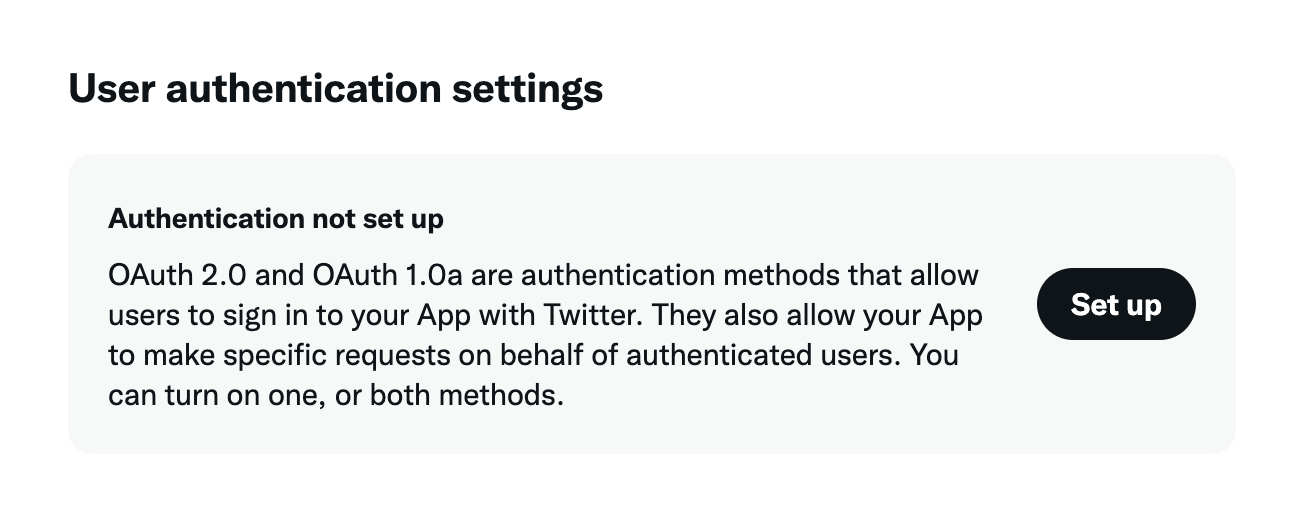
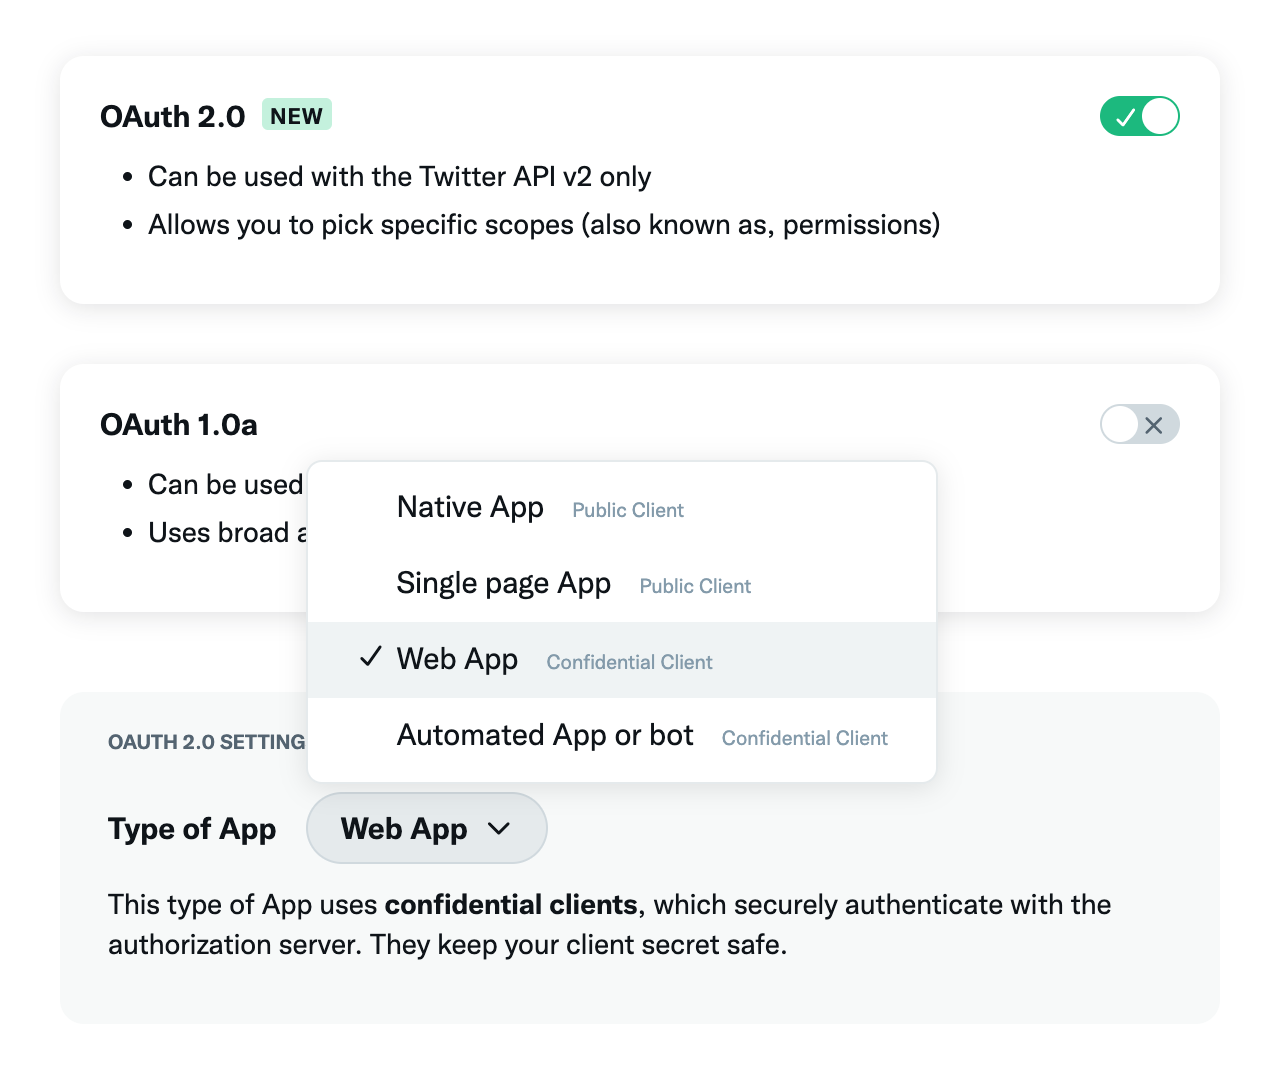
- Start the setup for the OAuth authentication settings by hitting the "Set up" button in the User Authentication Settings section.
- Select OAuth 2.0 and 'Web App' and enter URLs
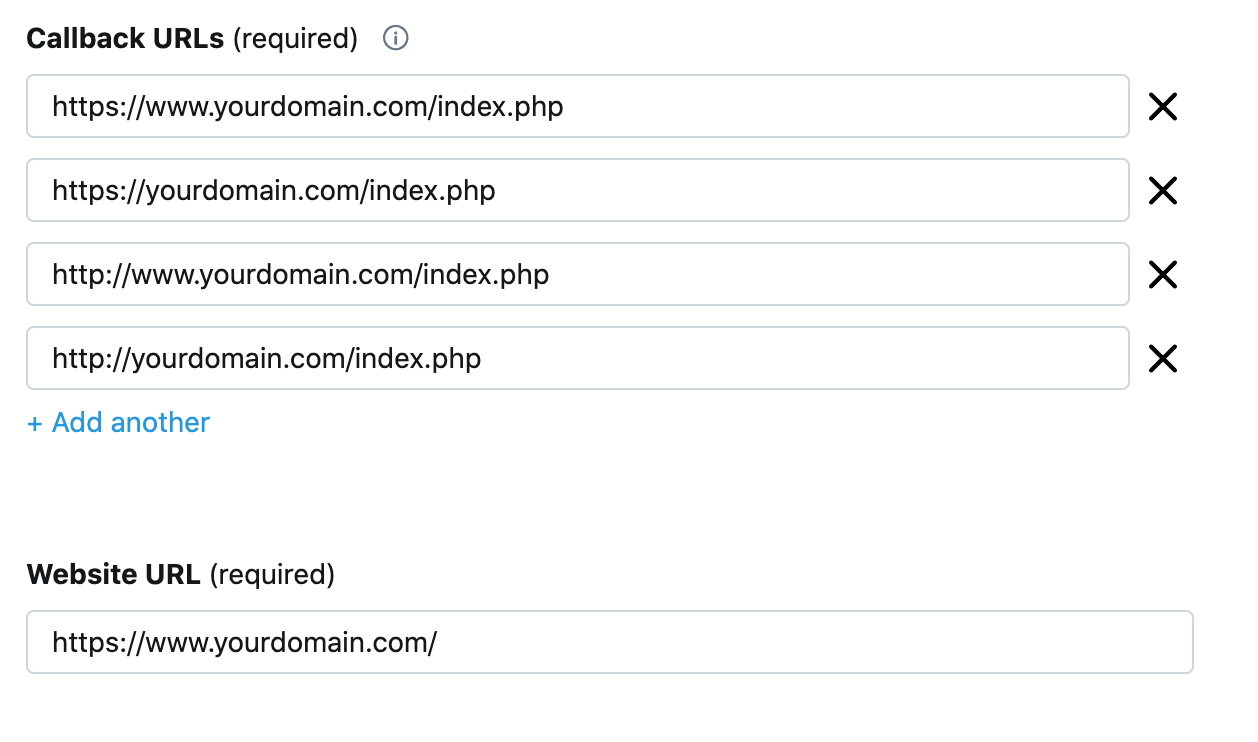
- Callback URI / Redirect URI - Your full website URL with 'index.php'. Add as many callback URLs as necessary for all variations of your site, like:
http://www.yourdomain.com/index.php?option=com_jfbconnect&task=authenticate.callback&provider=twitter
https://www.yourdomain.com/index.php?option=com_jfbconnect&task=authenticate.callback&provider=twitter
http://yourdomain.com/index.php?option=com_jfbconnect&task=authenticate.callback&provider=twitter
https://yourdomain.com/index.php?option=com_jfbconnect&task=authenticate.callback&provider=twitter
- Website URL - Your full website URL, like http://www.yourdomain.com/
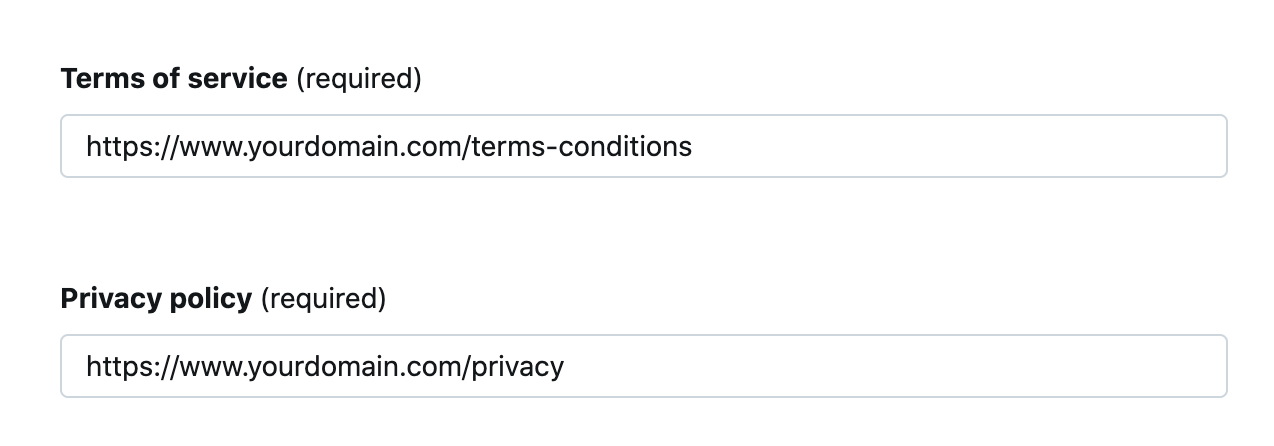
- Terms of Service - A link to your terms of service will be shown when users authorize your App.
- Privacy Policy - A link to your privacy policy will be shown when users authorize your App.
- Click Save.
- If for some reason, you need to use OAuth 1.1, the following settings are specific to 1.1
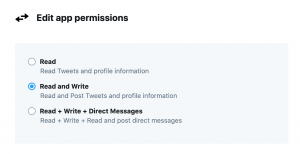
- App Permissions - If you would like to use JFBConnect's channels feature to display Twitter posts, please set this to Read and Write.
- Email from Users - If you'd like to support Automatic Registration for users, set "Request email from users" to On.
- Set the Callback URI / Redirect URLs and Website URL like in step 11.a
- Click Save.
- If you forget or lose your OAuth2 Client ID and Client Secret, you can regenerate these by visiting the Keys & Tokens tab at the top of your app.
- At this point, JFBConnect is ready for Twitter authentication.
Twitter Application Image
If you'd like to update the application image shown during the login/authentication process, go to the "App Details" of your Twitter Application and upload your image in the "App Icon".