JFBConnect v6.2 added support for Amazon authentication and integration. With Amazon integration, you can automatically create a user's account and fetch their name, email and zip code. While not a vast trove of information, this information can be enough to shuffle a user to through your shopping cart quicker and increase overall sales.
Before you begin, please note: Amazon requires an SSL certificate to be installed on your site for authentication to work. You will not be able to add Amazon authentication if your site cannot be reached over https.
The steps below are required to generate the API and Secret Keys required for Amazon authentication into your Joomla website:
- Log into the Amazon Login Developer Center at: http://login.amazon.com/
- Click the "Sign Up" button in the top right corner. Create an account if you don't already have one.
- In the top right, click the "Register new application" button.
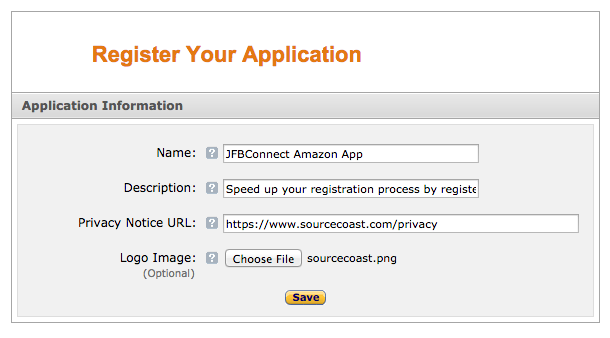
- Fill out the Application details that are required
- Name - The display name of your application that users will seeing during authentication. Generally this should be your website name.
- Description - A description shown to users explaining why they should authenticate with their Amazon.com credentials.
- Privacy Notice URL - Link to the privacy policy on your website.
- Logo Image - Upload an image file to be displayed on the Amazon authentication page. Should be 150x150 px (square) and in PNG format.
- Click "Save".
- Click the "Web Settings" title bar. A new section should expand with information to fill out.
- Click the "Edit" button in the new "Web Settings" section.
- Allowed Javascript Origins - Leave blank
- Allowed Return URLs - Add all variations of your secure (https) domain along with the following path:
index.php?option=com_jfbconnect&task=authenticate.callback&provider=amazon
Click the "Add Another" button to add additional domains or sub-domains (www, non-www) that will use Amazon for authentication. When done, you may have a few settings that look like:
https://domain.com/index.php?option=com_jfbconnect&task=authenticate.callback&provider=amazon
https://www.domain.com/index.php?option=com_jfbconnect&task=authenticate.callback&provider=amazon
- Click "Save". Your output should look like:
- From the "Web Settings" section, copy the following values to the JFBConnect -> Configuration -> Amazon settings area:
- Client ID
- Client Secret - You must click the "Show Secret" button to obtain this ID
Once those steps are done, your site is ready to allow users to authenticate using the Amazon.com credentials!